...
- The right-most pull down menu at the bottom of the Nanocad window is the the EXPORT MENU. Click on the EXPORT MENU pull down and choose GAUSSIAN INPUT for a Gaussian input file. After you do this, the Nanocad window will disappear, and you will be left at the Gaussian 03 Input GUI window.
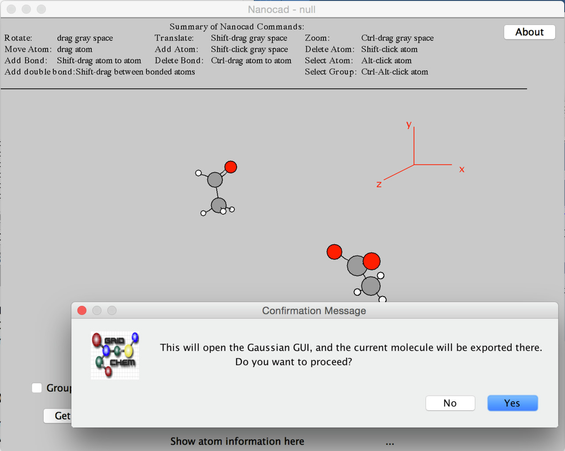
Image VIII - Importing Molecule - From the pull down menus chose: METHODS -> DFTs -> COMMON HYBRID FUNCTIONALS -> B3LYP
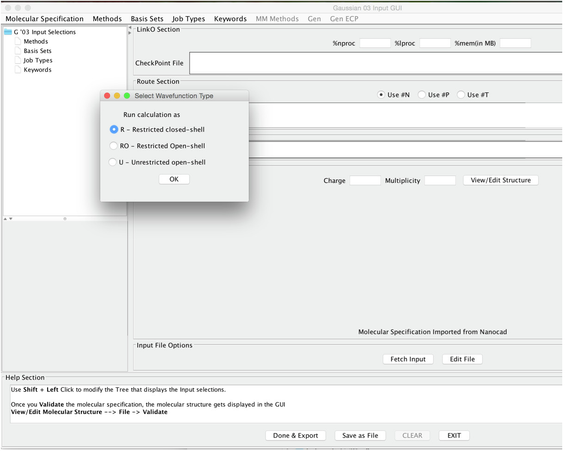
Image IX - Select Wavefunction Type - It opens a Select Wavefucntion Type panel; choose the Restricted option (Image IX above).
- From the pull down menus choose: BASIS SETS -> FREQUENTLY USED BASIS SETS - > 6-31G
- A box will pop up that asks "Add Polarization and/or Diffuse Functions". Choose YES
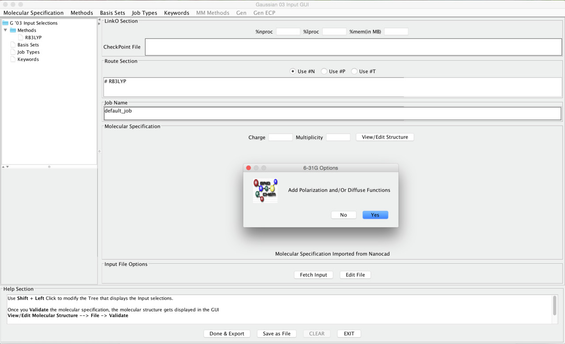
Image X - Adding Polarization Diffuse Function - Choose 6-31+G Diffuse Function (the fist first option)
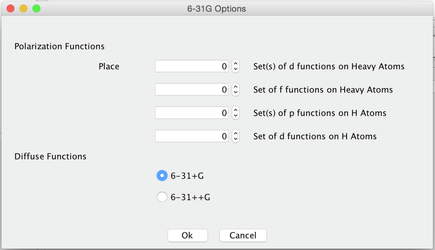
Image XI - Selecting 6-31+G Options - Choose Opt Freq under the Job Types menu Common Used Types
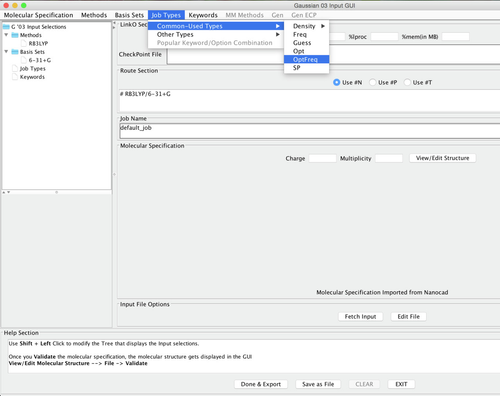
Image XII - Selecting Job Type - Under Keywords - Common Keywords Choose Pop ( for electronic population analysis) This provides a Pop Options panel and choose Reg (for regular) under the OutputFile column
- Under Keywords Choose Other Keywords . This open an Additional Keywords Panel.
- Select 1. GFInput 2. GFPrint and 3. IOP in this order.
6 - The last one (IOP) opens an Option for IOP Panel. Set the following values
For each of OP, OV, N, set - 6 7 3, respectively. ( These settings help some post processing programs).
- Click on Done button to close the top Options panel and the Done button in Additional Keywprds Panel to add all the keywords to the job.
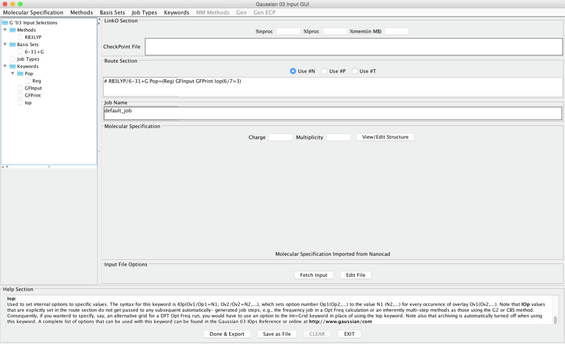
Image XIII - Gaussian Input GUI After Selecting Keywords - Set the following parameters:
- nproc = 16 lproc = 1 mem = 300mb
- Job Name: Acetaldehyde optimization
- charge = 0 Multiplicity = 1
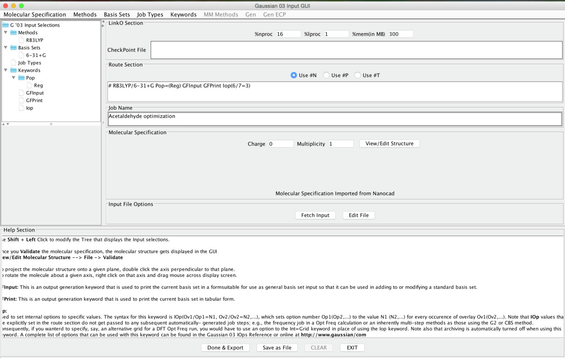
Image XIV - After Parameters Set
- Once the above parameters are set, click DONE&EXPORT
- The Gaussian 03 Input window will close and you will be taken to the Job Editor window. You will see your Job Editor window has the proper Gaussian input file for acetaldehyde in the editing area below "Input file Information", based on the options that have been specified. Chose the saveas option in the File menu and give a file name such as "acetaldehyde.inp"
- This saved file should appear in the Input File Information above. (If there was a a default sample input file please select the file and click on the – button below to remove it from the panel). This results in only one file which is acetaldehyde.inp
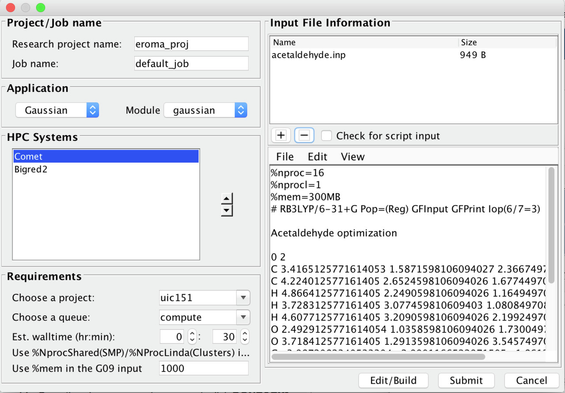
Image XV - Gaussian Job with the Newly Created Input File - Change other settings in this Job Editor window if necessary. For example
- Change job name from default_test to acetaldehydeopt
- Click the button VIEW/EDIT STRUCTURE and this will open up a Molecular Specification text view window, which will contain the molecule input data.
- Now, you are ready to submit your Gaussian job for processing.
- Click on the FILE pull down menu and select SAVE/DISPLAYMOL. A graphic representation of the molecule will appear in the Gaussian 03 Input GUI.
- Change the system you would like the job to run on.
- Chose Comet.
- Click SUBMIT button at the bottom right of SEAGrid: Job Editor window. Then this window will disappear and the focus will be on the Submit Jobs window with an entry for the job in the Queued Jobs list.
- Click the job in the job list if it is not highlighted.
- Then click the SUBMIT SELECTED JOBS TO QUEUE button to submit this job.
- After a small pop-up window indicating that your job is being submitted disappears, you will see your job in the Submitted Jobs list below.
- Once submitted the job can be minitored using MyCCG panel from the main window as in Excercise1.