SEAGrid Portal User Guide
- Eroma Abeysinghe
- Marlon Pierce
Introduction to SEAGrid Gateway
Hosted SEAGrid portal is the UI developed by the Airavata team for interested science communities to work with. This user guide provides step-by-step information on obtaining a complete science gateway experience for science and scholarly communities using Airavata as a middleware platform. In the user guide we would also discuss main features and services provided for gateway communities via Airavata.
User guide will tell you;
How to register users in the portal.
What are projects and how to use them.
How to create, launch and monitor experiments.
Sharing your work with others.
Using own allocation for job submissions in compute resources.
How to get help, provide feedback and request for new applications.
For more details on Airavata middleware visit Airavata site
Gateway Details
- Hosted SEAGrid Gateway link;
https://seagrid.org/ - Download application input files from;
Sample application input files I
Sample application input files II
Tutorial I - Gateway Login
Create Account
- A new user has to create an account using ‘Create account’ link on top right hand corner of the gateway.
- To create an account;
- Please enter mandatory information and submit. A confirmation message will confirm the creation.
- Important;
- Username cannot have spaces.
- Username & password must be longer than 5 characters.
- Password is case sensitive, need at least one number, one special character (!@#$%), at least one upper case letter and one lower case letter.
- Enter all the mandatory fields indicated by a star; *.
- Account creation page: https://seagrid.org/create
CILogon
- User can also login using campus credentials through CILogon. This is also available from https://seagrid.org/create
- Using CILogon will not require specific account creation to request access to the gateway, but still gateway admin will asses and give an active role to use the gateway.
Account Confirmation and Verification
Once the account is created you will receive an email to confirm the account creation.To confirm use the link provided in the email and follow given instructions.
Till the gateway administrator verifies and enable the account; you will not be able to submit jobs on compute resources.
Once the account is enabled the account owner will receive an email notification on new gateway privileges.
Gateway admin might even contact the user over email to get more information on research interests in order to assist the user.
Login to Account
- Once the account is created successfully; login to the gateway using the created account.
- Gateway login screen link
- OR use the 'Log In' link given on the 'Create New Account' page after account retain is successful.
- Login Page;
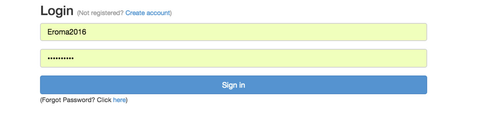
Image I - Login
Tutorial II - Add Own Cluster Allocation Details
- Gateway user can use their own compute resource(cluster) allocation within the gateway to launch jobs.
- Prior to using the allocation users need to set up the allocation account details in the gateway.
Add Allocation Details
- Navigate to User Settings (This is under gateway username in the menu on righthand side.
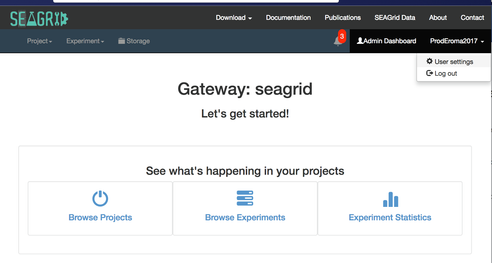
Image II - User Settings Navigation - User Settings Screen
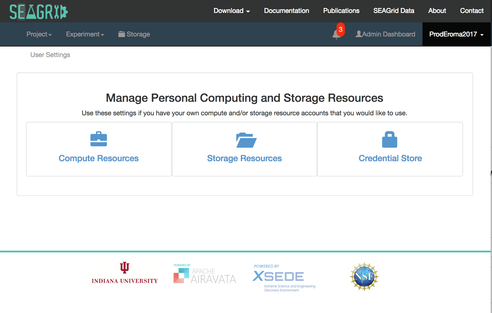
Image III - User Settings - Select Compute Resources from above to add allocation details.
- Click 'Add a Compute Resource Account'
- Select the resource from the dropdown list.
- Provide the required information. NOTE: You may not have allocation project, QOS or Reservation. Minimum requirement is the login username and the scratch location and SSH key.
- When assigning SSH key by default the default SSH key will be assigned. If user prefers can generate a new key and assign here.
Generate SSH Key
- For individual users to generate new SSH key navigate to User Settings → Credential Store
- In Credential store you will have the default key displayed and can be copied.
- To generate a new key provide a description and add.
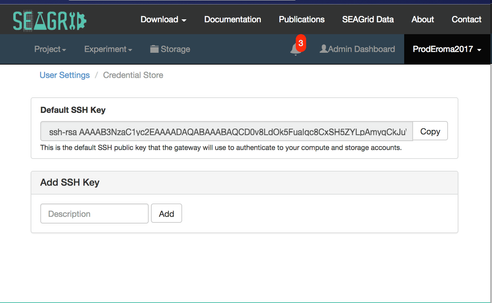
Image IV - User Settings → Credential Store - User can delete keys and also tag any key as the 'default' SSH key
Add SSH Key to Authorized Keys
- SSH keys are generated for secure communication between airavata middleware and compute resource.
- Once SSH key is generated, it needs to be added to the authorized keys file for user in the respective compute resource/cluster.
- To add the SSH key login to your account in the cluster.
- Navigate to .SSH directory and open authorized_keys.
- Add the SSH key assigned in user settings and save.
- If you have don't have .ssh directory or the authorized_keys file, create them.
Tutorial III - Use Projects
Use Project
- Projects are used to group experiments, they are containers. Experiments in the gateway has one to one mapping with jobs launched to compute resources.
- To create Projects, navigate to ‘Project --> Create’ from the main menu.
- Enter required mandatory information and Save.
- Project creation Screen
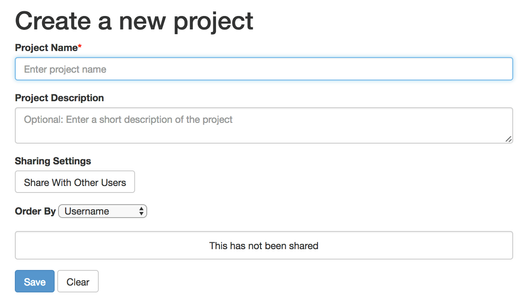
Image V - Create Project - While creating the project user can share the project with other gateway users.
- Upon saving you will be navigated to Project Summary page.
Browse Projects
- Screen navigation 'Project --> Browse' from the main menu.
- Search for projects using name or description
- Search Project Page;
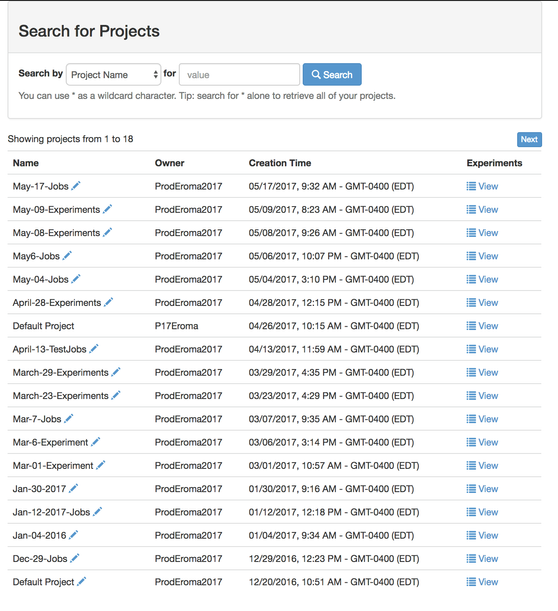
Image VI - Search Project - All the projects matching your search criteria will be listed.
- User can search for all projects by using (*) as a wild character. The * can be used when searching either options; project name or description.
- When projects are listed by clicking ‘View’ at the end of the row user can navigate to ‘Project Summary’ page; this page displays all experiments in the project. User can click on an experiment name and navigate to ‘Experiment Summary’ page.
- To traverse through existing projects use 'Next' button on top of the list on right.
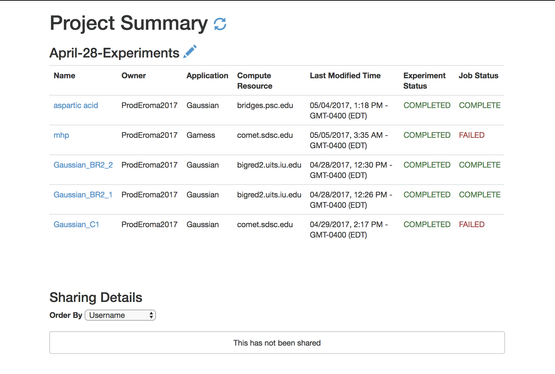
Image VII - Project Summary
Edit Projects
- Existing projects can be modified. The name, description can be changed.
- Project sharing can be changed as well. Project owner can add or remove the shared users.
Tutorial IV - Create & Launch Experiment
Create Experiment
- Experiment is the equivalent of a job on gateway side.
- To create an experiment; Navigation Experiment → Create Experiment
- Create Experiment Page - Experiment Information
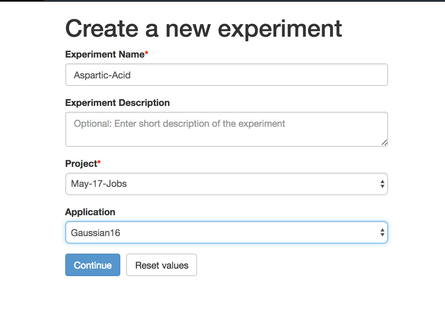
Image VIII - Create Experiment - Initially user need to enter/select given fields in order to continue.
- Experiment Name (Mandatory)
- Experiment Description (Optional)
- Project (Select from the available LOV)
- Application (Select from the available LOV)
- Then continue entering Application configuration information.
- Sharing Settings - In this section user can share this experiment with other gateway users. Use 'Share with Other Users' and search for gateway users and share. When sharing can specify whether 'read' or 'write' permission to provide.
- Experiment application input (Mandatory) - Application input can be in the form of entering data manually or uploading a single or multiple files.
NOTE: Uploading file validity is not checked by the gateway. User has the responsibility of uploading correct files. - Compute Resource (select from the available LOV)
- Use My Compute Resource Account - This checkbox will be checked by default if user have added user settings for the select compute resource. User can un-check the box and use community allocation to submit jobs to compute resource.
- Node Count
- Total Core Count
- Wall Time Limit
- Sharing Settings - In this section user can share this experiment with other gateway users. Use 'Share with Other Users' and search for gateway users and share. When sharing can specify whether 'read' or 'write' permission to provide.
- NOTE:
- For values c, d and e if user does not enter, default value will be taken as the input.
- For c and d user has to enter a value greater than or equivalent to 1.
- For e user has to enter a value greater than or equivalent to 0.
- Values to c and d could be decided sometimes based on the application or/and resource. Inserting the accurate values are currently in the hands of the user.
- Create Experiment - Application Configuration Part
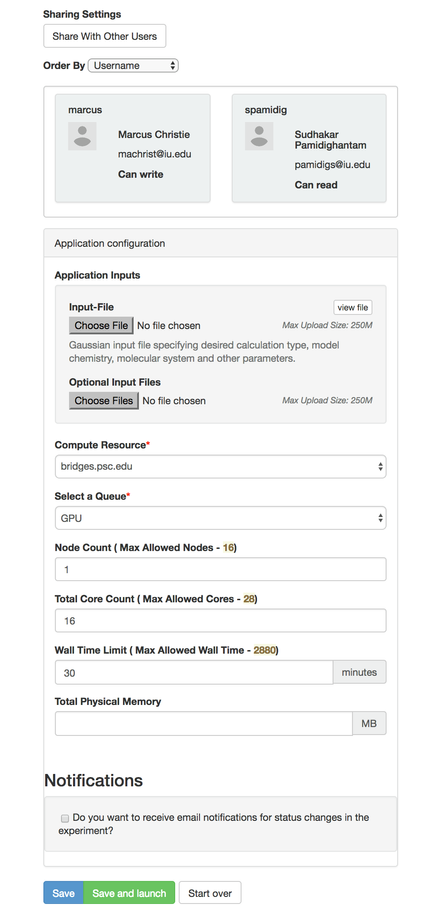
Image IX - Create Experiment Contd.. - While entering application configurations user can start over from the beginning using ‘Start Over’ button.
- Once saved or Saved and launched user will be directed to ‘Experiment Summary’ page; can refresh the page and monitor experiment status changes.
- Experiment Summary Page
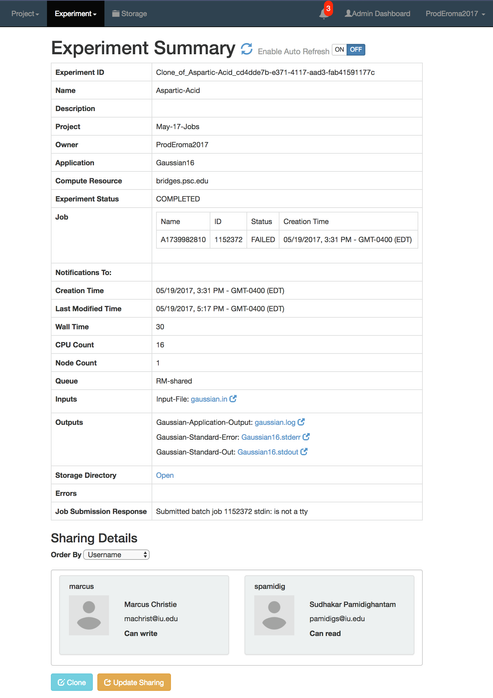
Image X - Experiment Summary
Launch Experiment
To launch an experiment user can Save & Launch in create experiment page above.
For previously saved experiments, to launch user has to navigate to 'Experiment Summary' Page.
If the experiment is not suppose to be launched e.g.: a COMPLETED, LAUNCHED experiment, then the launch button will be disabled.
Tutorial V - Browse Experiments
User can search for experiment created by him/her through
Experiments → Browse
Browse Projects → View Project → View Experiment (by clicking on the status of the experiment) - Please refer Search Projects in Tutorial II above.
In Search Experiments search keys are;
Experiment Name
Experiment Description
Application
…
Browse Experiments Page

Image XI - Search Experiments
All the experiments of the user will be listed; latest on top. User can also select the search by key, user has to give a value to search for using the key. Partial values, complete values, (*) wild card can be used to search.
Click on Search once the search key is selected and value is entered. User can also search for experiments by giving the status.
All the experiments as per entered Key value pair will be listed.
By clicking on the 'Status' user will be navigated to ‘Experiment Summary’ screen of each experiment.
In experiment summary users can;
Launch experiment - Explained in above Tutorial IV
Cancel experiment
Clone experiment
Edit experiment
User can edit an experiment by navigating to 'Edit Experiment' page. Edit button next to each experiment name will navigate user to 'Edit Experiment' page of each experiment.
Tutorial VI - Modify, Cancel & Clone Experiments
Modify Experiment
Modify experiment by clicking on the edit icon (pencil) next to experiment name OR by clicking on ‘Edit’ button in Experiment Summary Page.
User can modify all available fields except experiment status, application & experiment ID.
User can update experiments with statuses;
CREATED
VALIDATED
Edit Experiment Page
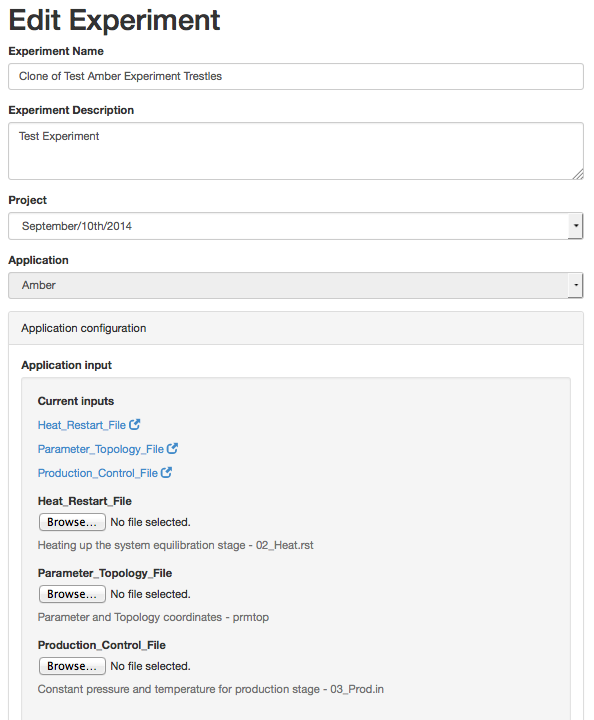
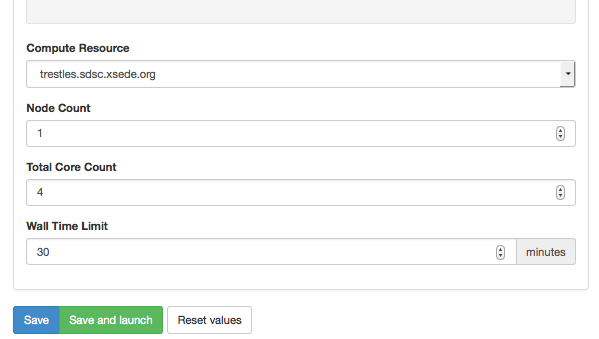
Image XII - Edit Experiment
Cancel Experiment
- Experiments can be canceled by navigating to experiment’s 'Experiment Summary’ screen.
- Experiment statuses which allows cancellations;
- LAUNCHED
- EXECUTING
- SCHEDULED
- Click on ‘Cancel’ button and immediately the Experiment status will change to CANCELING.
- If the job is not already processing in the remote resource the job will proceed to COMPLETE and upon completing the experiment status will change to CANCELLED. Since the user requested a cancellation generated output will not be provided back to the gateway.
- If the job was successfully CANCELLED upon changing the job state to CANCELLED experiment status will also change to CANCELED.
- CANCELED experiments are only available for cloning in the PGA.
Clone Experiment
Experiments can be cloned irrespective of the experiment status by clicking ‘Clone’ in ‘Experiment Summary’ page.
When clicks ‘Clone’ from experiment summary user will be navigated to ‘Edit Experiment’ page of the new experiment. The new experiment will have exact same information as the earlier existing experiment.
The new experiment will have a new experiment ID and the status will always be CREATED.
New experiment name = Clone of + Old experiment name
User can change existing information in ‘Edit Experiment’ page and save or save & launch.
Tutorial VII - User Assistance
Gateway user can report issues faced, request for new applications using https://seagrid.org/pages/contact