Building a Molecule (Acetaldehyde) & Running Gaussian Job
- Eroma Abeysinghe
Owned by Eroma Abeysinghe
Last updated: May 04, 2017
Tutorial I - Launch and Use NanoCAD in SEAGrid Client
This section will show you how to use NanoCAD to build a new molecule (acetaldehyde) and generate a Gaussian input file.
- Click Nanocad button from the main menu in home screen. This opens NanoCAD editor.
- After NanoCAD has launched, take your time to read text "Summary of NanoCAD Commands" at the top of NanoCAD window (Indicated by the green box in Image I).
- You will get basic idea how to use NanoCAD
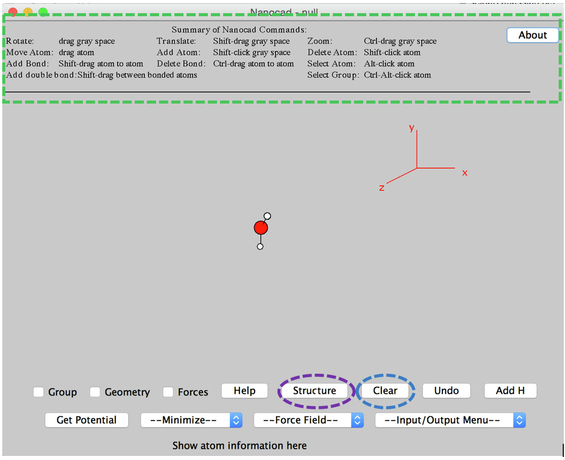
Image I - Nano CAD
- You will get basic idea how to use NanoCAD
- If there is an example water structure in the NanoCAD window, to erase this click the Clear button (Circled by blue in Image I).
- Go ahead and click Clear.
- To build a new structure, you need to click the STRUCTURE button at the bottom of the Nanocad window (Circled by purple in Image I).
- A new small window with the title Import Structure will pop up on top. (Hint: Move the Nanocad window slight below the Import Structure panel so both are visible simultaneously)
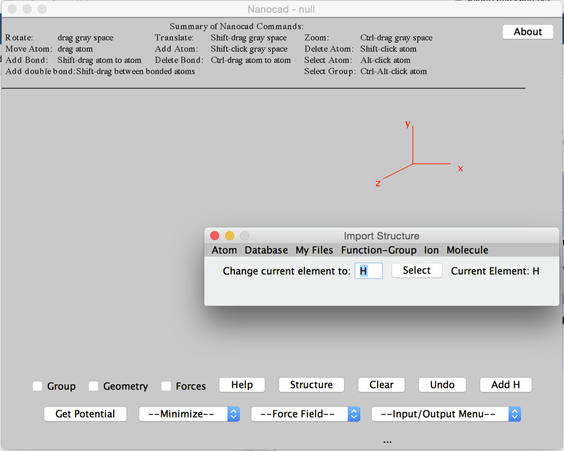
Image II - Import Structure Pop-up Window
- A new small window with the title Import Structure will pop up on top. (Hint: Move the Nanocad window slight below the Import Structure panel so both are visible simultaneously)
- In the Import Structure window, the current element (default element is H) is the atom you will be able to put into the Nanocad window.
- To change the current element, you can type the element name after "Change current element to:" and click SELECT to the current element.
- In this case, type C and click SELECT button to change the current element to carbon. Atom names start with uppercase letters. For barium one should type Ba, for example.
- Shift-click in the gray area of Nanocad window, a gray carbon atom will appear after your click.
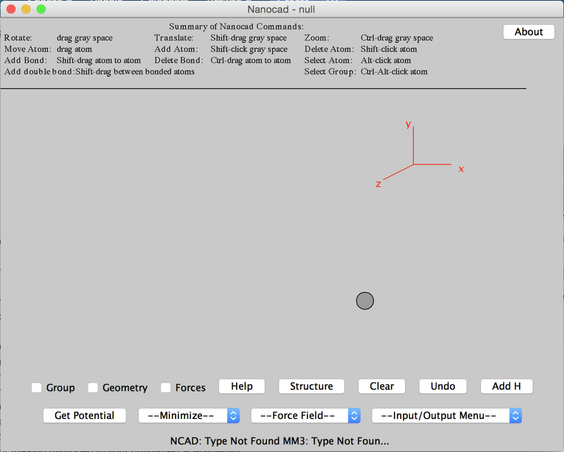
Image III - Nano CAD Window with Carbon Atom - Then Shift-click the area close (not on top) to your previous carbon atom, you will get your second carbon atom close to your first one. (if it is too close it can be deleted by shift and clicking the atom).
- You may notice that there is no bond between two carbons. To build a bond between your two carbons, you need Shift-drag from one carbon to the other carbon. (Detailed operation: press shift key and do not release it, then drag one atom to the other. You will see there is a line with one end attached to the starting carbon, the other end you move with your cursor. While you move your cursor, the two atoms will temporarily change their color to the background color, indicating that you are doing an active operation. When you move your cursor over the other carbon, release (in this order) 1. your mouse 2. the shift key the bond will exist between two carbons. And the atom color will change back to deep gray (Image IV - Linked Carbon Atoms)
- Change the current element to oxygen in the Import Structure window. (Type O and click SELECT.)
- Shift-click in Nanocad window, close to one carbon. A red atom (oxygen) will appear. (Image V - Red Oxygen Atom)
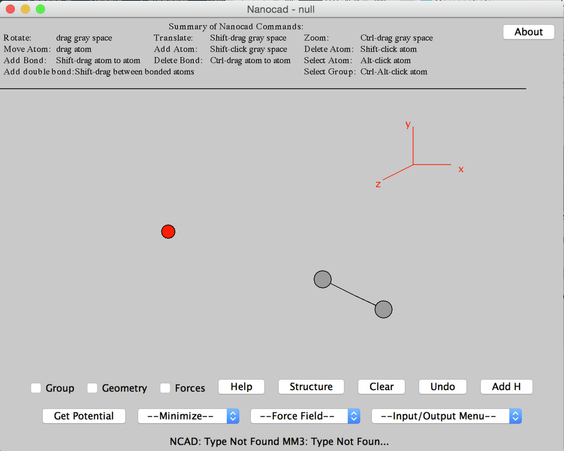
Image IV - Nano CAD Window with Two Carbon Atoms and One Oxygen Atom - To build a carbon-oxygen bond, shift-drag from the one carbon atom to the oxygen atom. Since carbon-oxygen bond in acetaldehyde is a double bond, you need to repeat this process one more time. You will see a double bond between carbon and oxygen atoms.

Image V - Double Bond Between - Now we have all the heavy atoms in acetaldehyde. The only missing atoms are hydrogen. Adding hydrogen is relatively easy: click ADD H button at the bottom of the Nanocad window. You will see that Nanocad adds the four missing hydrogens to your unfinished acetaldehyde molecule.
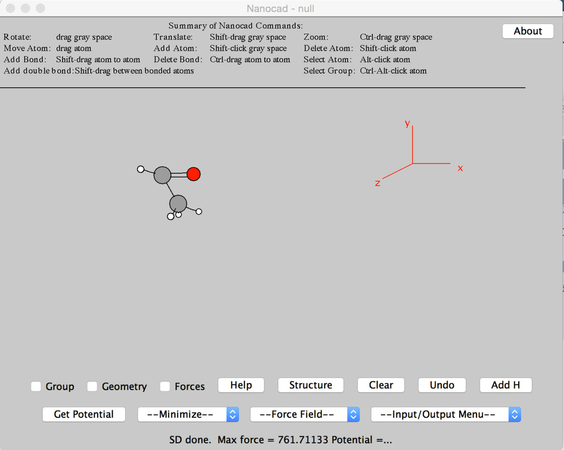
Image VI - Unfinished Acetaldehyde Molecule - The last step for building acetaldehyde is minimizing the current structure. Click the MINIMIZE pull down menu at the bottom of the Nanocadwindow, and choose either the CONJ. GRAD. (Conjugate Gradients) method or the STP. DESC. (Steepest descent) method to minimize the current molecule. Hint: Nanocad has lots of template molecules to choose from. In the Import Structure window, click on ION, FUNCTION-GROUP or MOLECULE to check them out. Now, the building of the acetaldehyde molecule is finished. You are ready to get a Gaussian input file for this molecule.
Tutorial II - Create Your Gaussian Input File
- The right-most pull-down menu at the bottom of the Nanocad window is the EXPORT MENU. Click on the EXPORT MENU pull down and choose GAUSSIAN INPUT for a Gaussian input file. After you do this, the Nanocad window will disappear, and you will be left at the Gaussian 03 Input GUI window.
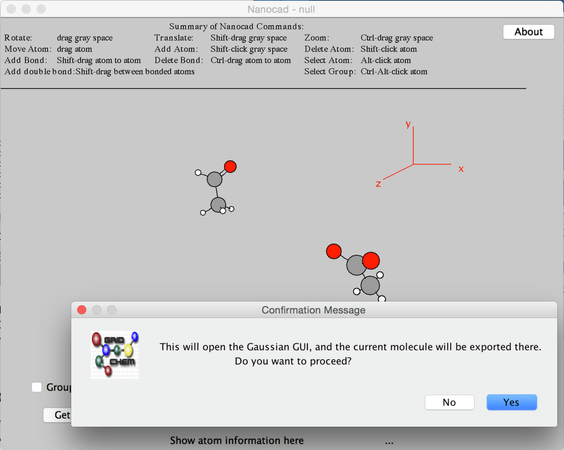
Image VII - Importing Molecule - From the pull down menus chose: METHODS -> DFTs -> COMMON HYBRID FUNCTIONALS -> B3LYP
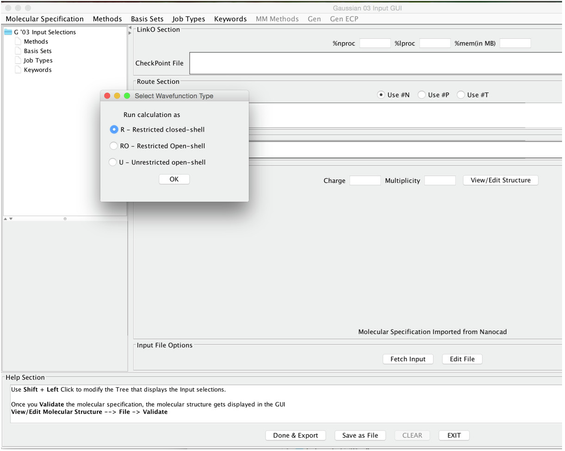
Image VIII - Select Wavefunction Type - It opens a Select Wavefucntion Type panel; choose the Restricted option (Image IX above).
- From the pull down menus choose: BASIS SETS -> FREQUENTLY USED BASIS SETS - > 6-31G
- A box will pop up that asks "Add Polarization and/or Diffuse Functions". Choose YES
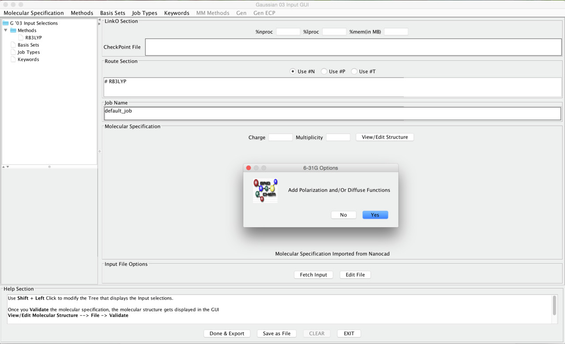
Image IX - Adding Polarization Diffuse Function - Choose 6-31+G Diffuse Function (the first option)
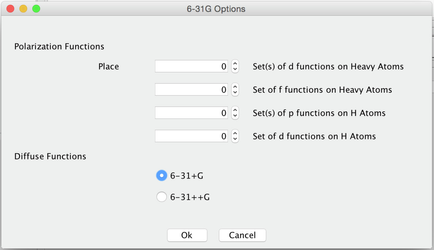
Image X - Selecting 6-31+G Options - Choose Opt Freq under the Job Types menu Common Used Types

Image XI - Selecting Job Type - Under Keywords - Common Keywords Choose Pop ( for electronic population analysis) This provides a Pop Options panel and choose Reg (for regular) under the OutputFile column
- Under Keywords Choose Other Keywords . This open an Additional Keywords Panel.
- Select 1. GFInput 2. GFPrint and 3. IOP in this order.
- The last one (IOP) opens an Option for IOP Panel. Set the following values
For each of OP, OV, N, set 6 7 3, respectively. ( These settings help some post processing programs). - Click on Done button to close the top Options panel and the Done button in Additional Keywprds Panel to add all the keywords to the job.
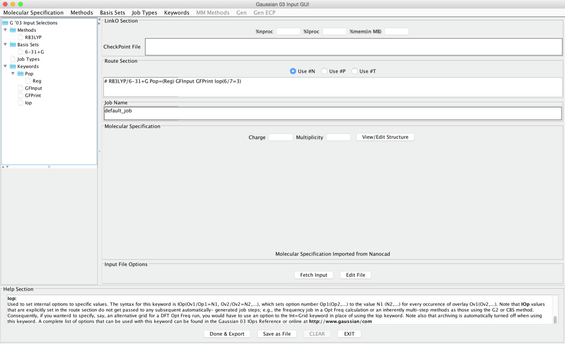
Image XII - Gaussian Input GUI After Selecting Keywords - Set the following parameters:
- nproc = 16 lproc = 1 mem = 300mb
- Job Name: Acetaldehyde optimization
- charge = 0 Multiplicity = 1
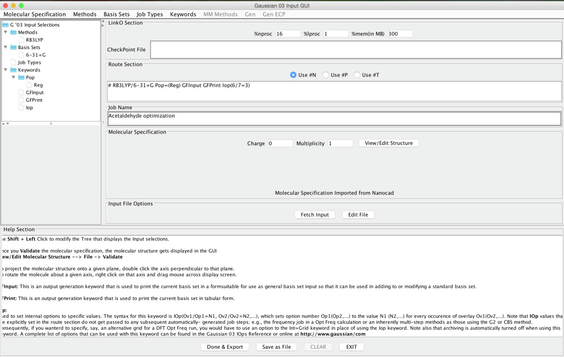
Image XIII - After Parameters Set
- Once the above parameters are set, click DONE&EXPORT.
- You will be directed to 'Create Experiment' Window with the gaussian input you created.
, multiple selections available,