/
Using Nanocad
Using Nanocad
- Eroma Abeysinghe
Owned by Eroma Abeysinghe
Last updated: May 08, 2017
Tutorial - Use Nanocad & Create Gaussian input
- Navigation to Nanocad editor (From top menu): Molecular Editors → Nanocad
- After Nanocad has launched, take your time to read text "Summary of Nanocad Commands" at the top of Nanocad window (Indicated by the green box in Image I).
- You will get basic idea how to use Nanocad
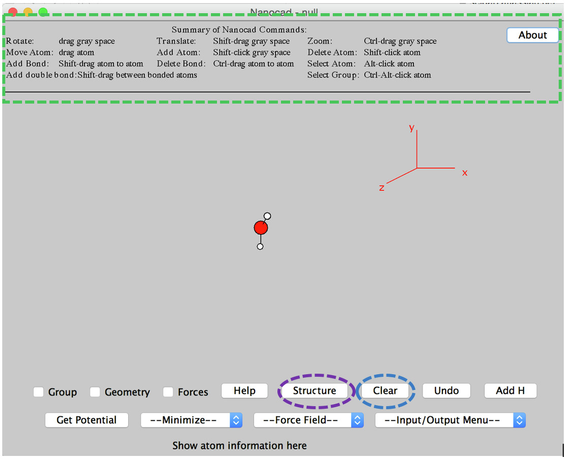
Image I - Nanocad Editor
- You will get basic idea how to use Nanocad
- If there is an example water structure in the Nanocad window, to erase this click the Clear button.
- To build a new structure, you need to click the STRUCTURE button at the bottom of the Nanocad window.
- A new small window with the title Import Structure will pop up on top. (Hint: Move the Nanocad window slight below the Import Structure panel so both are visible simultaneously)
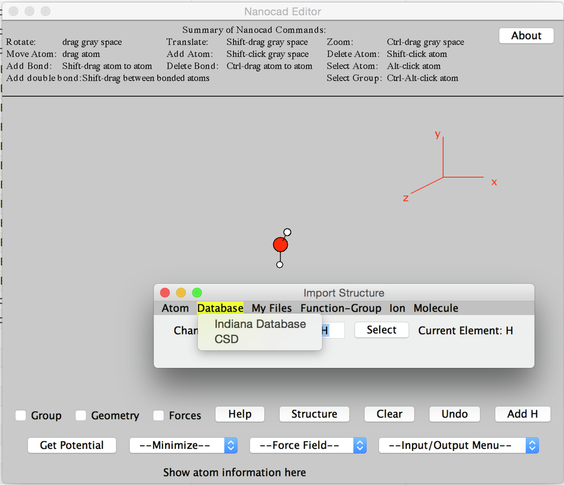
Image II - Import Structure Pop-up Window
- A new small window with the title Import Structure will pop up on top. (Hint: Move the Nanocad window slight below the Import Structure panel so both are visible simultaneously)
- Go to Database → CSD
- Search for 'Norbornane' and double click 'C9 H12 O4'.
- The molecule will appear on the editor and to center the molecule ctrl + click on the empty background space area (not on the atom).
- Ctrl + move the moues to enlarge the molecule.
- From Input/Oputput Menu at the right bottom select, Gaussian input.
- A pop-up message, 'This will open a Gaussian GUI, and the current molecule ..........' say Yes.
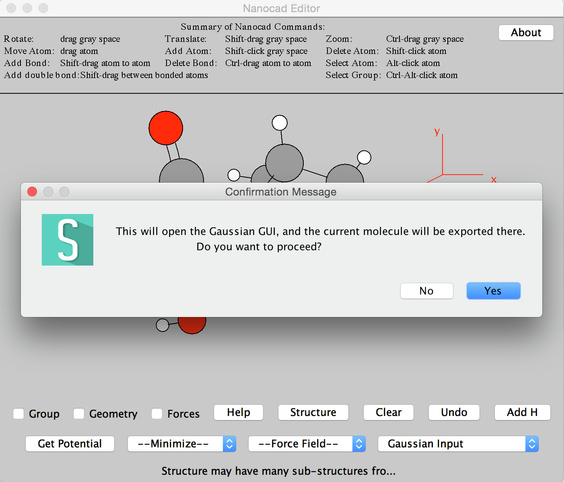
Image III - Message Pop-up Window - A Warning message 'WARNING:Molecule information has been exported correctly..........' will appear and say, Yes.
- Opens Gaussian 09 Input GUI.
- Click View/Edit Structure button and it opens the molecule structure of the exported molecule.
- Select Save/DisplayMol from Molecule Specification →File menu.
- Then the molecule will be displayed in the main Gaussian 09 GUI.
- Close the Molecule Specification window.
- Select Method --> DFT-> Common Hybrid Functionals→B3LYP.
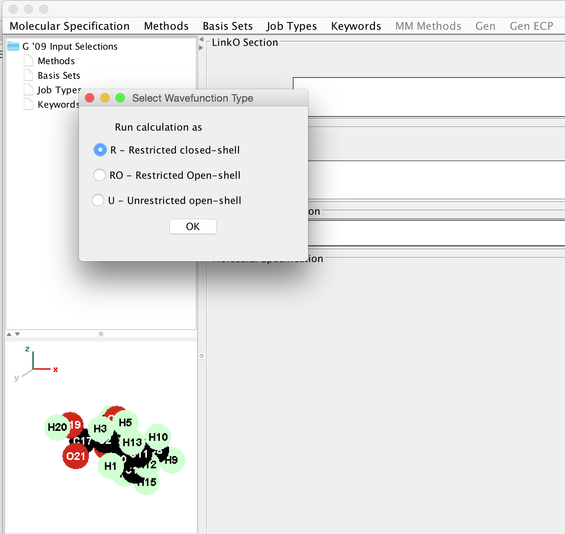
Image IV - Select Wavefunction Type - Opens 'Select Wavefunction Type' select 'R - Restricted closed - shell'.
- In the Gaussian 09 Input GUI → Route Section you should have # RB3LYP. You would see the same under Methods in the window on top left hand side with tree structure.
- Select, Basic sets → Frequently-used basis sets → 6-31G. Say 'Yes' to Add Polarization d and/Or Diffuse Function.
- In 6-31G options set, Sets of d functions on Heavy atoms and Sets of p functions on H atoms to 1.
- Select 6-31+G in Diffuse functions.
- Now in Route Section you would have # RB3LYP/6-31+G(d,p)
- Select Job-types → Commonly-used job Types → Opt.
In Opt options, click 'Done' (no need to select any options).
- In Route Section you would have: # RB3LYP/6-31+G(d,p) Opt
Select Keywords → Common Keywords → Pop. In Pop options select 'Reg' and say done. Route Section should have # RB3LYP/6-31+G(d,p) Opt Pop=(Reg).
Select Keywords → Other Keywords and select GFInput, GFPrint and IOp options. In Iop options give Overlay - 6, options - 7, Value - 3. Now Rounte Section will have # RB3LYP/6-31+G(d,p) Opt Pop=(Reg) GFInput GFPrint Iop(6/7=3).
Hint: Below in Help section you would be able to view all the descriptions of each keyword selected and displayed in the tree structure on left top.
- In Gaussian 09 Input GUI, set %nproc - 24, %mem(in MB) - 2000
- Provide a checkpoint file name, norbornane.chk
- Job Title & Description: Norbornane di carboxylic acid RB3LYP/6-31+G(d,p) Opt Pop=(Reg) GFInput GFPrint Iop(6/7=3)
- Add charge = 0, multiplicity = 1.
- Click Done & Export button.
- Create Experiment window will open with the created Gaussian input and with already defined exp name and description.
- Select bridges.psc.edu to run and RM-Shared queue.
- Save & Launch the experiment.
, multiple selections available,
Related content
Using Nanocad to find Molecules
Using Nanocad to find Molecules
More like this
Pentanediol for Gaussian using Nanocad & CSD
Pentanediol for Gaussian using Nanocad & CSD
More like this
American Chemical Society (ACS) Workshop on Science Gateways
American Chemical Society (ACS) Workshop on Science Gateways
More like this
Building a Molecule (Acetaldehyde) & Running Gaussian Job
Building a Molecule (Acetaldehyde) & Running Gaussian Job
More like this
Using Gamess Editor
Using Gamess Editor
More like this
PEARC18 Hackathon Instruction
PEARC18 Hackathon Instruction
More like this